 カートを見る
 マイページ
マイページ 新規会員登録
 LINEで質問
 お問い合わせフォーム
 企業様のOEM製作、または加盟店加入についてのご相談


 カートを見る
 カスタマイズする
 各種お問合せ
User’s manual
Thank you very much for your purchase.
This user’s manual describes this product and precautions for use.
Before using this product, please read this instruction manual carefully and use it correctly in accordance with its contents.
Table of contents
Product Notes
- 1. Battery-powered (quartz) watch
2. Mechanical (automatic) watch
3. About water resistance
4. About screw-lock crowns
5. About GEM stone crowns
How to change and adjust the strap
- 6. How to change the strap
7. How to change the strap (quick release)
8. How to fine-tune the buckle
9. How to adjust the rubber band
10. How to attach the D-buckle band
How to maintenance
Repair and replacement inquiries
Product Notes
This product has passed our quality tests, but if a defect occurs when using the product in a manner that is not in accordance with the instruction manual, we will provide a free warranty for the product within the warranty period.
Please keep the quality warranty card and purchase receipt in a safe place.
●Please note that extreme high and low temperatures may cause the watch to break down. In particular, leaving the watch near the dashboard of a car may cause the dial to discolor or the movement to malfunction.
●The internal movement is vulnerable to strong magnetism and may cause the watch to break down, so please be careful not to store the watch near electrical appliances, computers, mobile phones, AV equipment, etc. for long periods of time. *Please note that if the internal movement becomes magnetized, it may cause the watch to malfunction or cause delays in time.
<Precautions for use>
●Depending on your constitution, you may experience itching or a rash. If you notice any abnormalities on your skin, discontinue use and consult a medical specialist.
●Remove the watch when doing heavy lifting, playing strenuous sports, sleeping, or caring for small children, as it may cause physical injury.
●Do not wear the watch in high temperature locations such as saunas or extremely cold locations such as ski resorts, as it may cause burns or frostbite.
●Contains small parts. Do not put in mouth. There is a risk of choking.
●Do not give to children under 3 years of age as there is a risk of accidental ingestion of metal parts.
●After use, store out of reach of children under 3 years of age to prevent unexpected accidents.
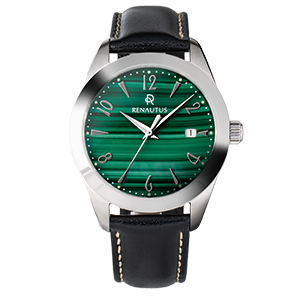
1. Battery-powered watch
Quartz
● The monitor battery used at the time of purchase will be replaced with a new one before shipping if the remaining battery level is found to be significantly low during the circuit inspection during the movement inspection.
● How to set the date
* When trying the method below, be sure to set the time to "6 o'clock" before proceeding to prevent damage to the parts.
Pull the crown out one notch and continue to turn it counterclockwise until the correct date is displayed.
* The date will advance from 1 to 31, so for months with up to 30 days, you will need to change the date manually.
● How to set the time
Pull the crown out two notches and turn it clockwise or counterclockwise.
* After adjusting the time, date, and day of the week, be sure to return the crown to its original position.
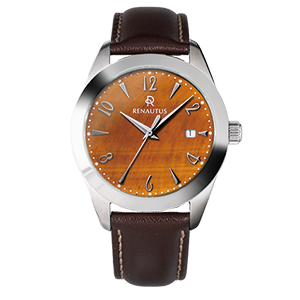
2. Mechanical watch
Automatic
Automatic mechanical watches are vulnerable to vibrations, and the error in the time per day varies depending on the conditions of use. When adjusted before shipping, the basic position is adjusted to within ±15 seconds per day, but depending on the frequency of use and the environment, it may deviate significantly from the tolerance. When wearing the watch, the mainspring is automatically wound by the movement of the arm, but if you think that the amount of winding is low, turn the crown clockwise about 10 to 20 times. We recommend that you wind it every day before wearing it. When manually winding a watch that has completely stopped, turn the crown about 40 times to wind the mainspring before wearing it.
If not worn on the arm, it will stop after about 38 to 40 hours. The operating time is the operating time when the mainspring is fully wound, and the operating time varies depending on the type of movement.
● How to set the date (date model only)
* When trying the following method, be sure to set the time to "6 o'clock" to prevent damage to the parts.
Pull the crown out one notch and continue to turn it until the correct date is displayed (MIYOTA: counterclockwise; ETA: clockwise).
*The date advances from 1 to 31, so you will need to manually change the date for months with up to 30 days.
●How to set the time
Pull the crown out two notches and turn it clockwise or counterclockwise.
●How to set the day of the week
Pull the crown out one notch and turn it counterclockwise until the correct day of the week is displayed.
*After adjusting the time, date and day of the week, be sure to push the crown back in.
3. Waterproof performance
[Products marked with 3ATM]
Waterproof for everyday use (3 ATM), indicating that the product can withstand sweat, rain, and water droplets that adhere to the product when washing the face.
[Products marked with 5ATM]
Waterproof for everyday use (5 ATM), indicating that the product can withstand rain, washing the face, and light water work.
[Products marked with 10ATM]
Enhanced water resistance for everyday use (10 ATM), indicating that the product can withstand water work and splashes from rivers and pools. *Not suitable for swimming.
[Products marked with 20ATM]
Enhanced water resistance (20 ATM), indicating that the product can withstand marine sports, swimming, skin diving, etc.
*Not suitable for scuba diving.
*Please note that the product may not be waterproof if it is suddenly exposed to water pressure, such as diving into water.
●Depending on the frequency of use and the environment in which it is used, the gasket performance will decrease after about two years and the product will no longer exhibit its original waterproof performance. Please feel free to contact us for maintenance or other inquiries.
If the product is exposed to seawater, it must be washed with fresh water, otherwise the gasket may deteriorate and the case may rust.
4. Screw-lock crown
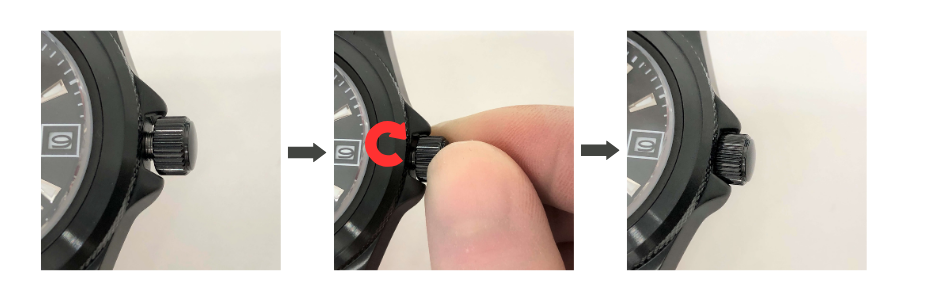
・The screw-down crown can be locked by pushing the crown in and twisting it clockwise. Be sure to screw it all the way in before wearing or using the watch.
※Caution
・If the crown is not screwed in completely, the gasket will not work properly and the watch will not be waterproof. Temperature differences may also cause the glass to fog up.
・For mechanical watches, be sure to release the crown before winding the watch.
・After winding, be sure to screw the crown back in.
5. GEM stone crown
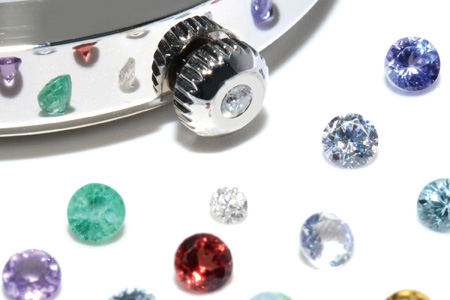
● If exposed to high temperatures for a long period of time, the adhesive holding the metal part and birthstone in place may malfunction, causing them to fall off.
● GEM stones are sensitive to direct sunlight, and may deteriorate (discolor) if exposed to strong sunlight for a long period of time.
● As GEM stones are natural minerals, there are individual differences in color, shine, pattern, inclusions, etc.
The color may also appear different depending on the color of the crown in which the stone is embedded.
● Do not bring into hot springs, etc., as the ingredients in the stone may cause the GEM stone to discolor.
How to change and adjust the strap
6. How to change the strap
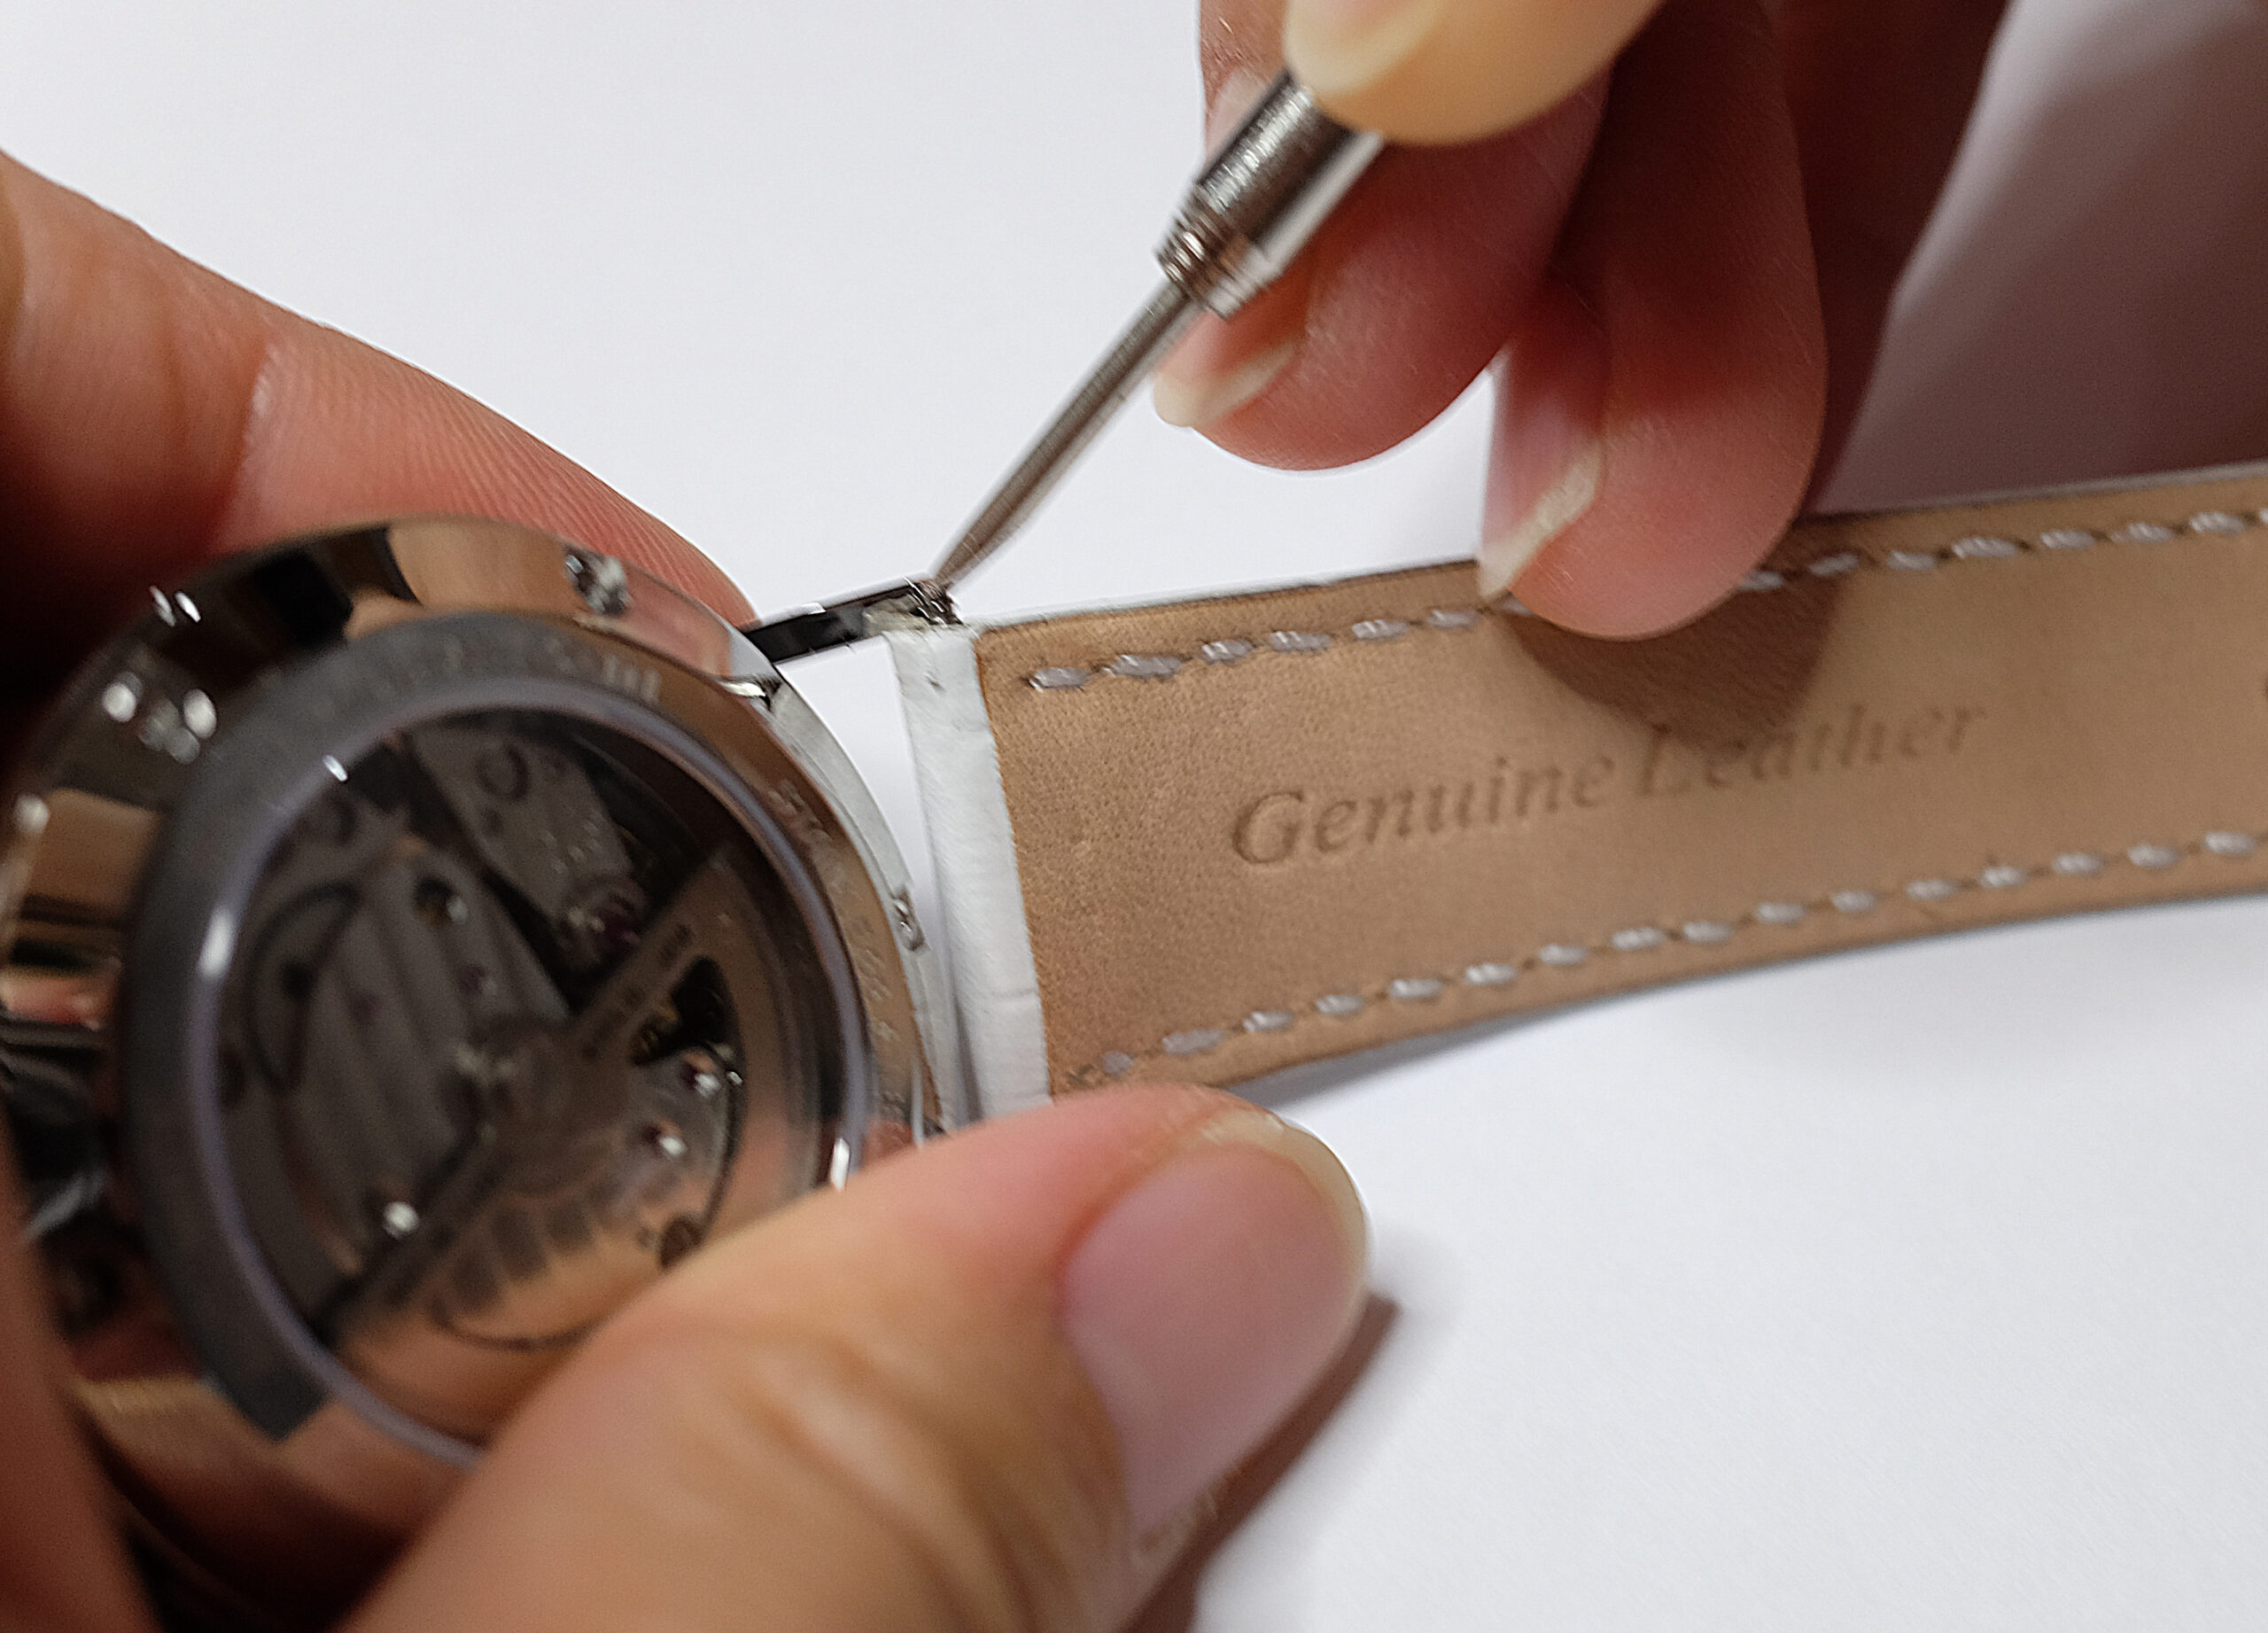
① Insert it into the gap between the watch body and the strap.
② Hook the spring bar into the V-shaped part of the spring bar remover and push it down to remove the spring bar from the watch body.
*Remove the other strap in the same way.
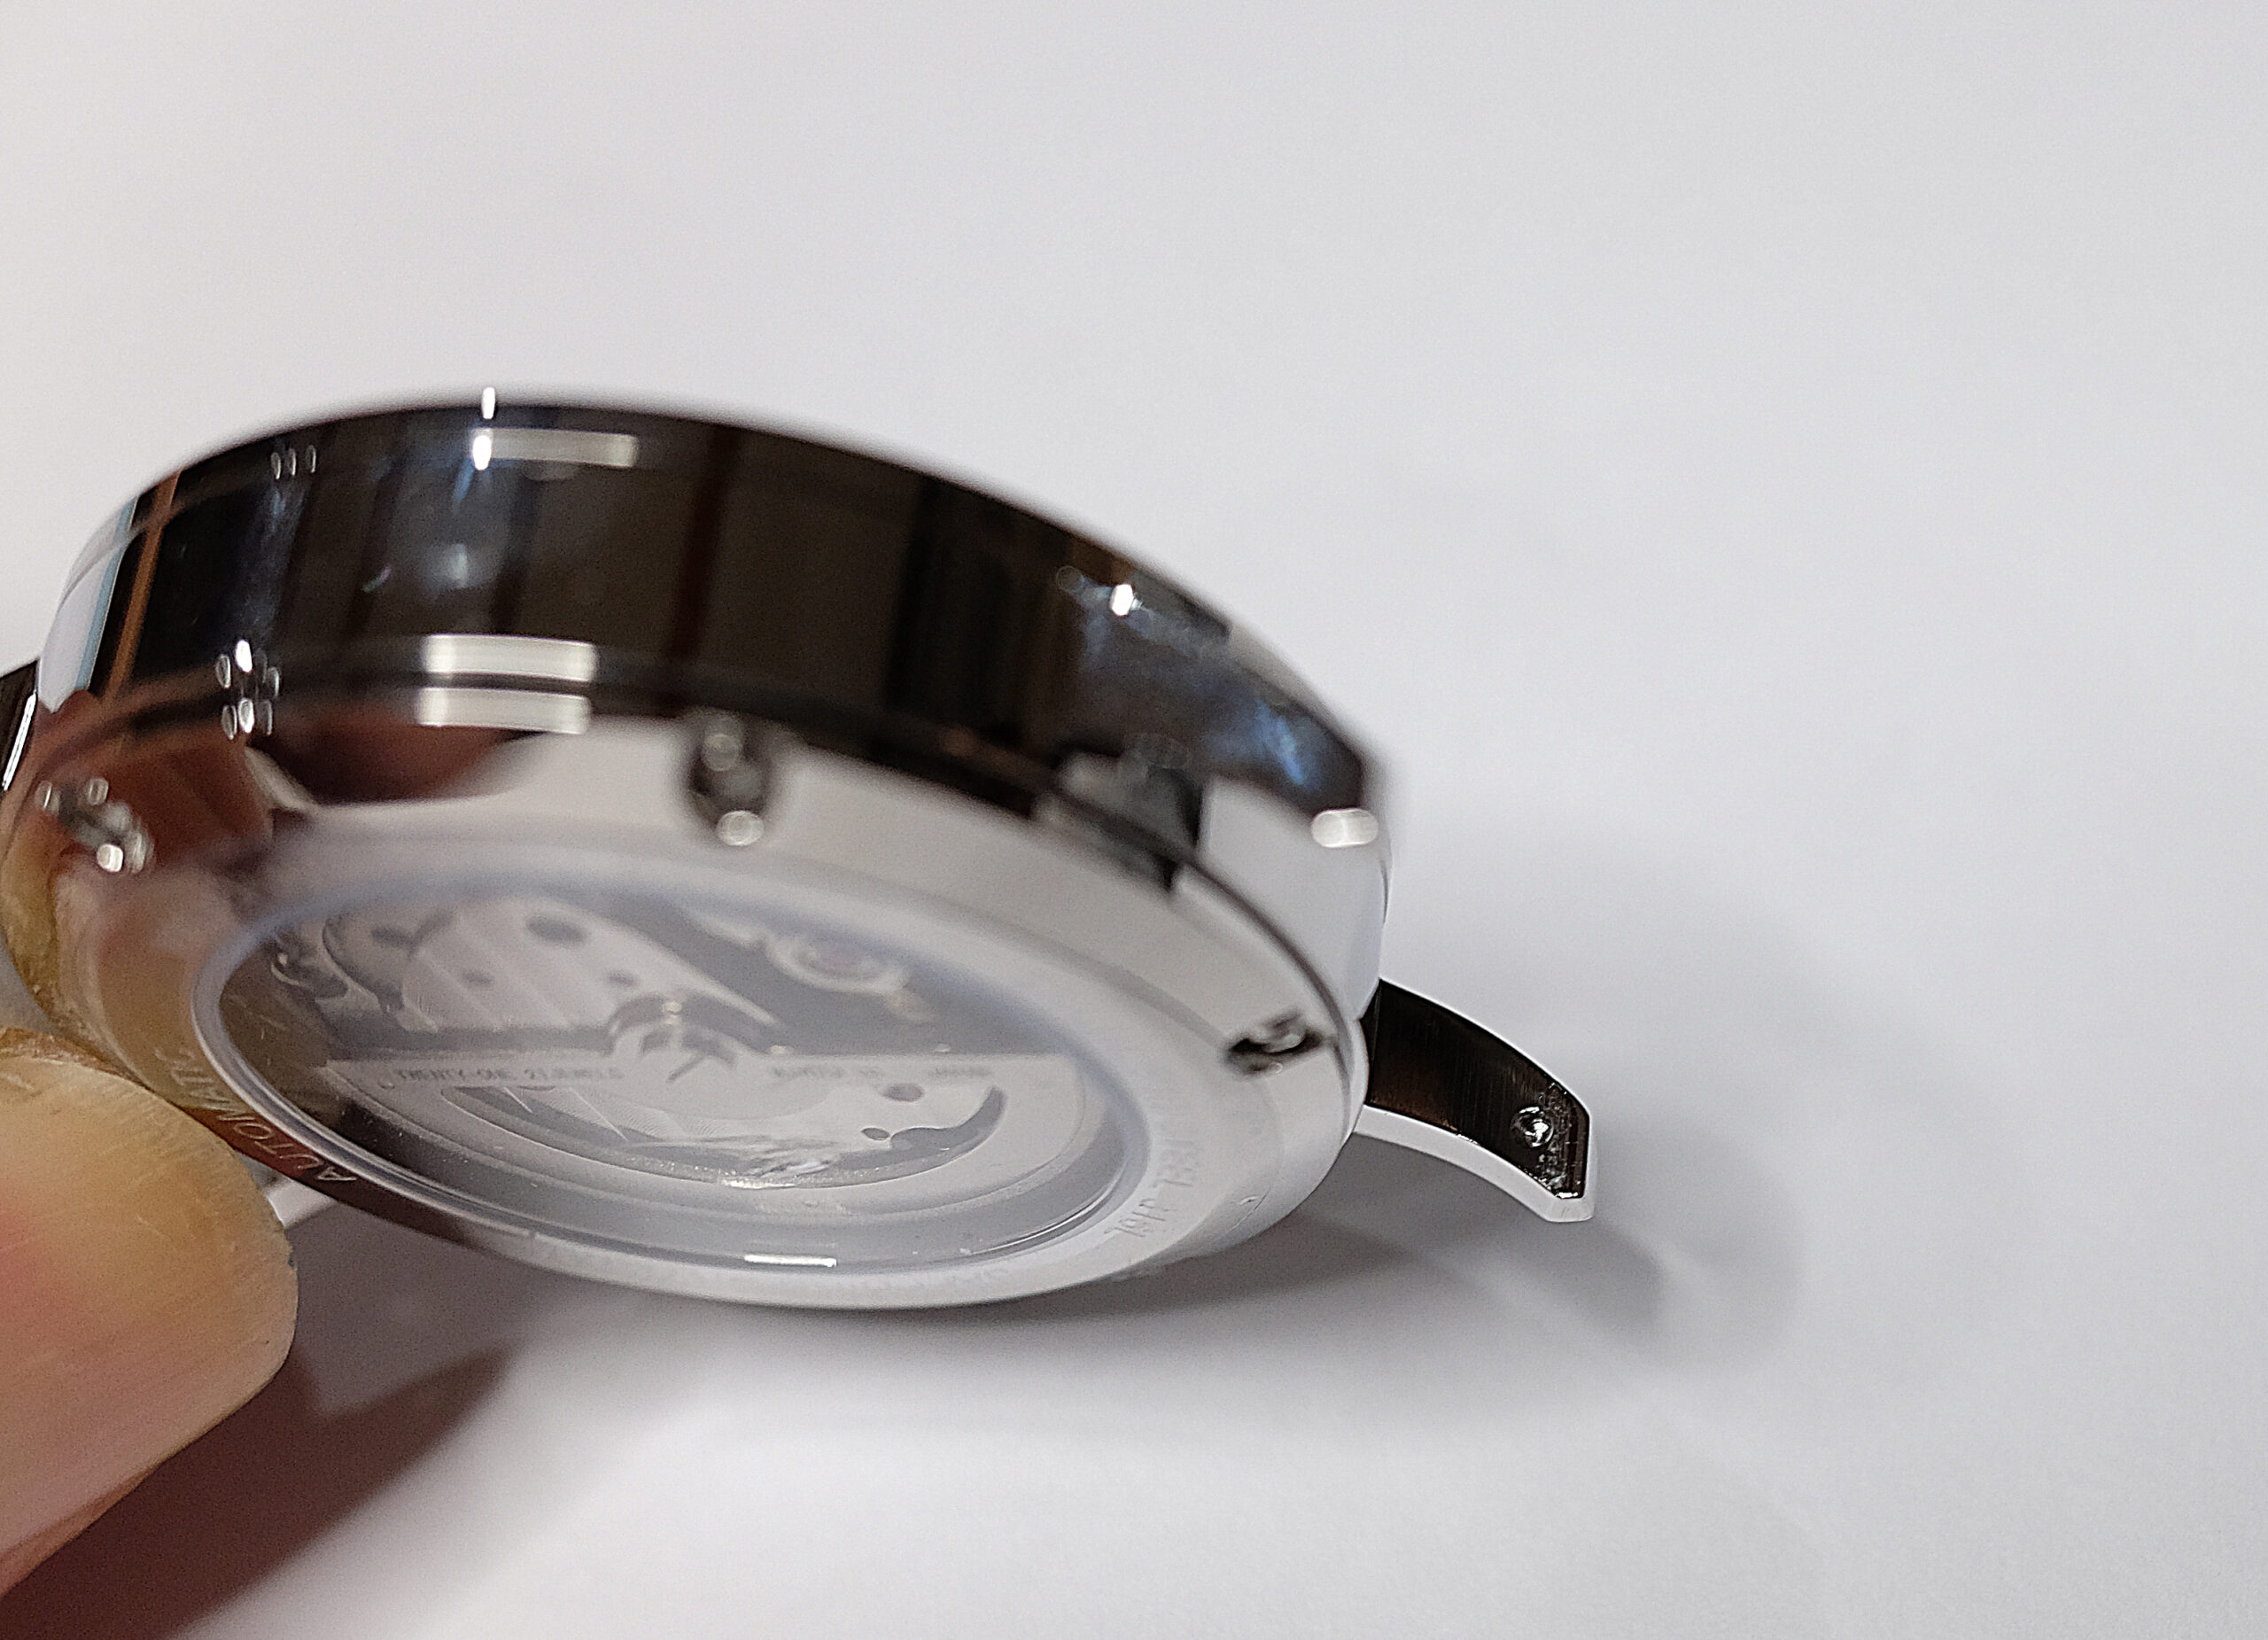
③ Attach the spring bar to the belt you are replacing and insert one end of the spring bar into the recessed part of the belt attachment part.
4. Use a spring bar remover tool to push down on the other end of the spring bar and insert it into the hole at the top.
5. Gently tug on the belt to make sure it is completely inserted into the hole and will not come off.
7. How to change the strap
(Quick release)
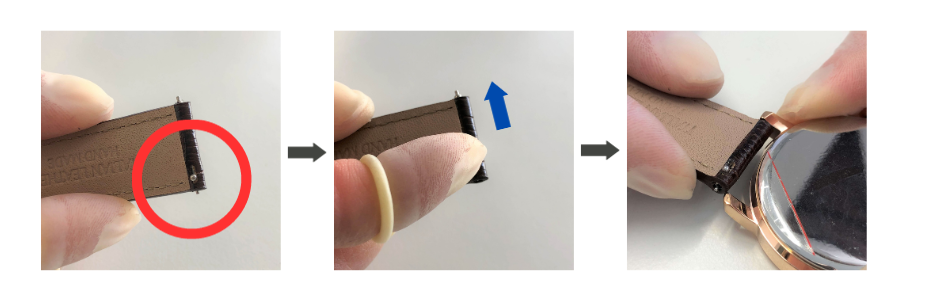
A quick-release type is a watch that has a knob to make it easy to put on and take off the strap.
By pulling the knob, the spring slides in, making it easy to put on and take off.
Place the spring opposite the knob into the watch first, then pull the knob to make sure the spring is in place before replacing the strap.
8. How to fine-tune the buckle
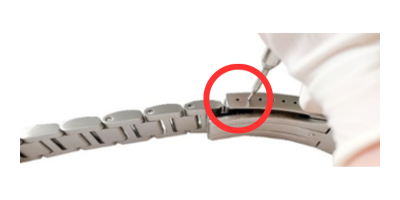
1. With the buckle open, insert the spring bar removal tool into the circled area and remove the belt.
2. Move the end of the belt to the hole you want to adjust and use the spring bar removal tool to insert it into the hole.
3. Check that the spring bar is securely inserted before wearing the belt.
8. How to buckle adjustment
*Caution
If you cut too much, you won't be able to put it back, so please be careful.
Try to make the number of cuts as even as possible on the top and bottom.
When cutting the links, cut in order starting from the buckle side.
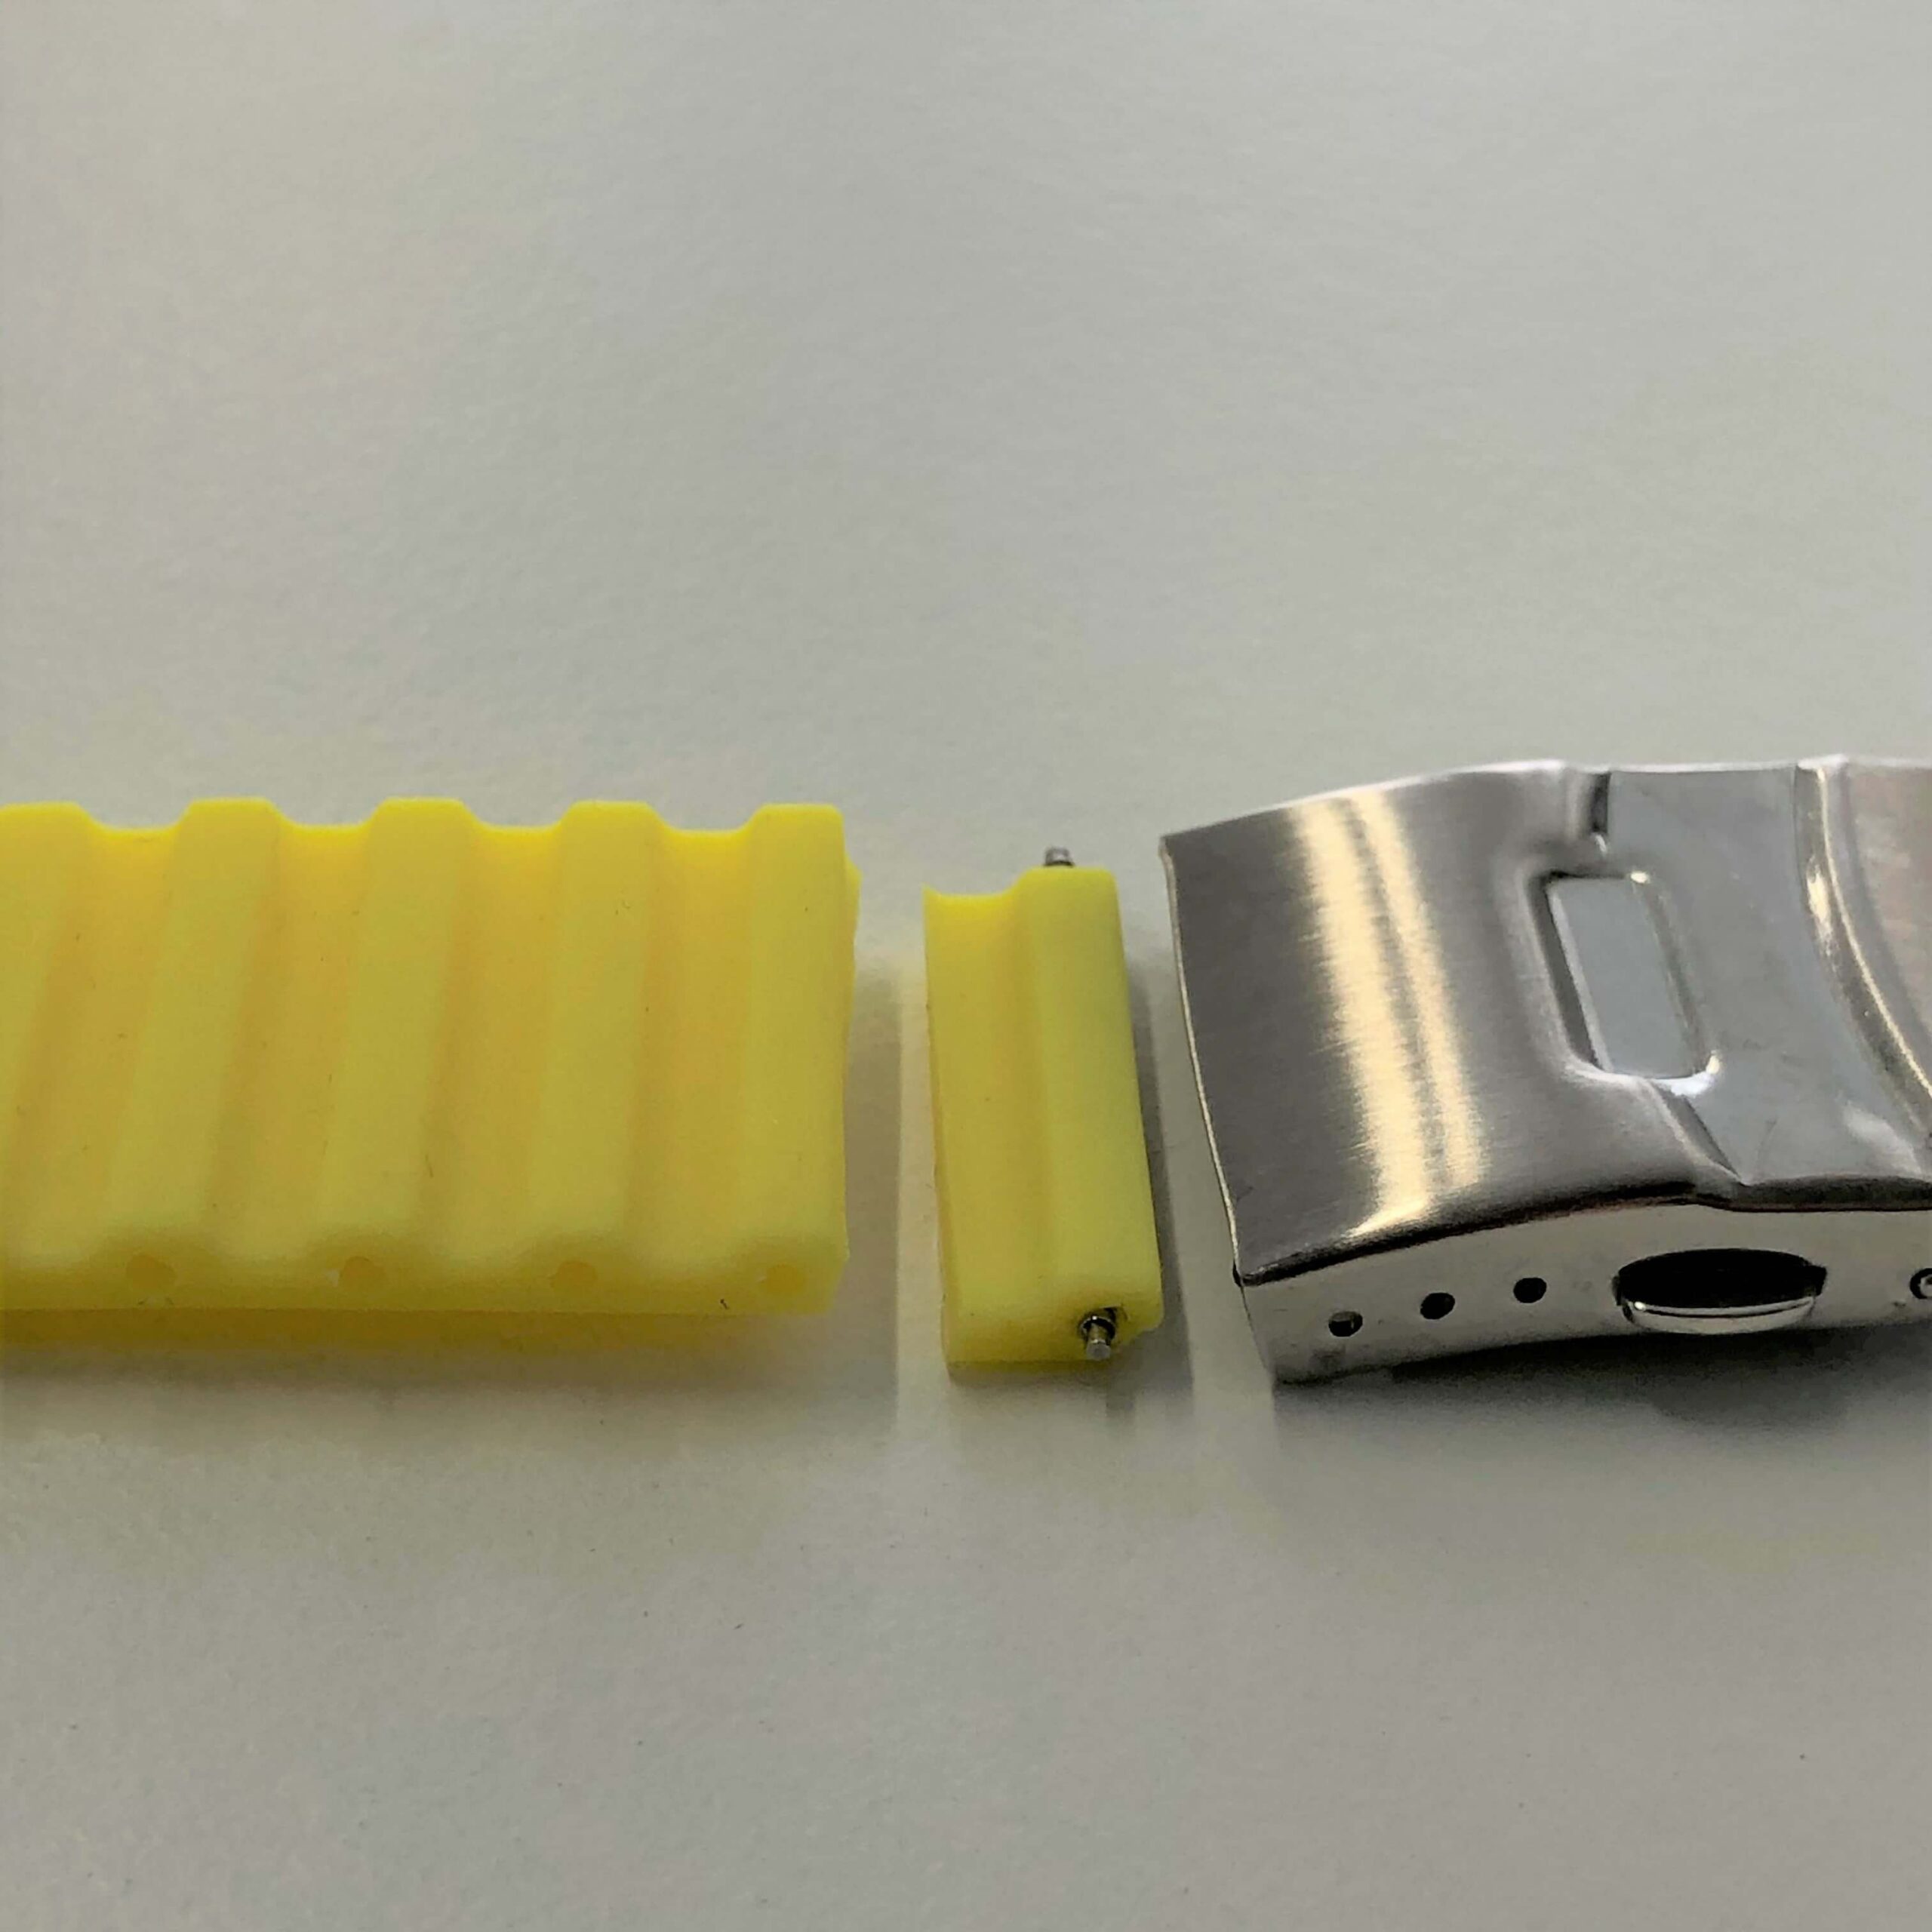
1. Insert the spring bar remover between the rubber band and the buckle and hook and remove the spring bar.
2. Cut the rubber band to the desired length.
3. Put the spring bar back on the rubber band and attach it to the buckle by reversing steps 1. Once you've checked that the spring bar is securely inserted, the process is complete.
10. How to attach the D-buckle
*In rare cases, the buckle may open when bending your wrist.
*We recommend wearing the watch in a position where the push button does not come into contact with your hand when bending your wrist.
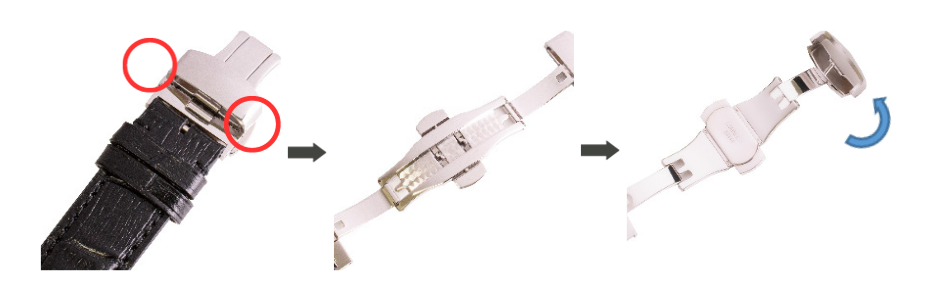
1. Pinch both sides of the push button and press to open the buckle.
2. Turn the buckle over and hook your fingers on the top box to open it.
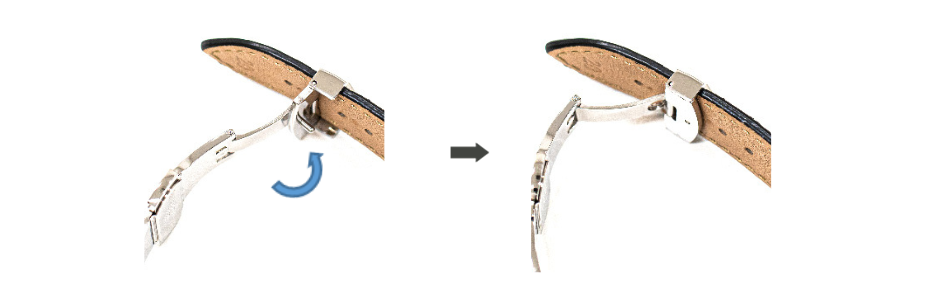
③ Pass the belt through the opening made in ② and insert the pin into the belt hole. Make sure the pin is in place, then use your finger to lift the pin and push it in until you hear a click.
④ With the belt connected by the buckle, put it through your arm. Then fold the open buckle and push it in until you hear a click.
*When folding the buckle, be careful not to pinch your skin.
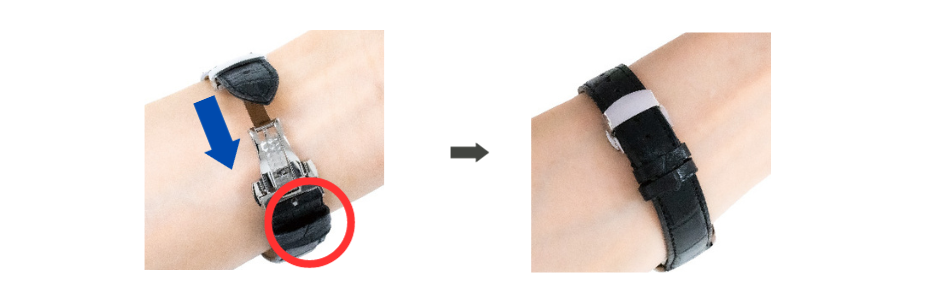
⑤ After folding the buckle, put the belt through the fixed loop.
⑥ Put the belt through the free loop and it's ready to wear.
If the belt is too tight or too loose around your arm, go back to step ③ and adjust by changing the position of the holes.
How to maintenance
Watch body: Made from highly corrosion-resistant materials, but leaving sweat or dirt on the watch can cause rust, so it is important to always keep it clean with a dry cloth after use.
Leather bands:
Our leather bands are made from genuine leather. Please take the following points into consideration.
- Leather products are very sensitive to water, so avoid water as much as possible.
- Moisture from sweat, salt, and sebum proteins will seep into the leather and cause it to lose flexibility, so it is important to wipe it off lightly with a dry cloth after use.
- Wearing the watch loosely and allowing good ventilation will help maintain its condition. It is recommended that the band is tight enough to fit one finger's width.
Metal bands, rubber bands:
If metal bands are left after use, they can rust or cause dirt to get stuck between the links, so we recommend cleaning them regularly.
- Apply liquid soap or mild detergent to the band, scrub with a soft brush (you can use your bare hands for rubber bands), rinse with tap water to remove all detergent, and wipe off all moisture.
- Remove the watch from the body before cleaning.
- The rubber band may transfer color due to adhesion. Please note that color transfer may occur if the band is rubbed against color-fading clothing or bags.
Repair and replacement inquiries
We accept repairs and part replacements for watches purchased from Renautus.
*Please note that products without a warranty and an unknown order number cannot be repaired or replaced, whether free of charge or for a fee.
*Please be sure to use a courier service to ship your product. Please note that shipping in simple packaging is not covered by the warranty.
*For details, please refer to the warranty and repair service details.
Click here to request a repair or part replacement → https://renautus.com/repair-request/
We also accept repairs after the warranty period has expired, so please feel free to contact us.
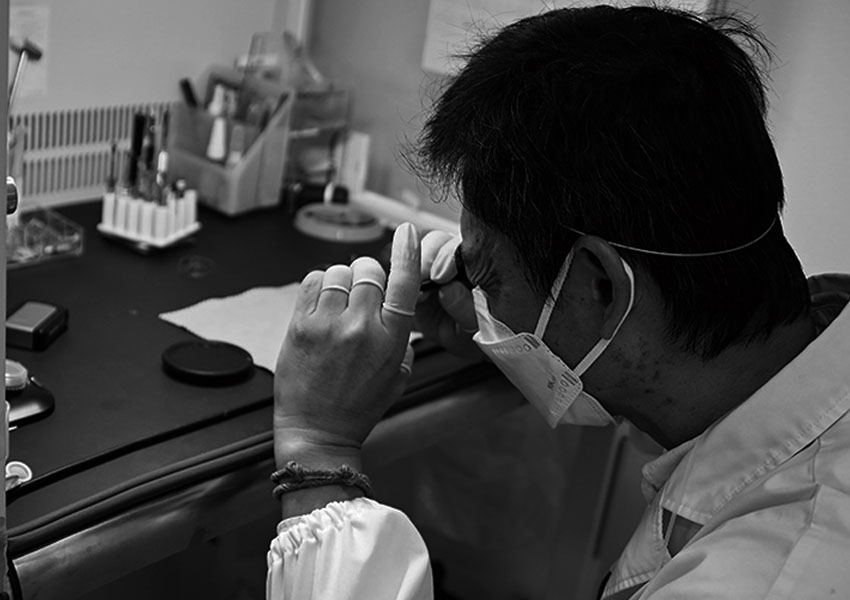
Custom watches made by craftsmen in Japan
Renaultas watches are made to order. Japan's finest watchmakers will craft your precious watch one by one without compromise. The name of the craftsman who made the watch will be inscribed on the warranty card, ensuring that your precious watch will last for many years to come.


 カートを見る
 マイページ
マイページ 新規会員登録
 LINEでお問い合わせ
 お問い合わせフォーム
 ショールームのご案内
 企業様OEM製作のご依頼
 加盟店加入のご相談
 カートを見る
 マイページ
マイページ 新規会員登録
 LINEでお問い合わせ
 お問い合わせフォーム
 ショールームのご案内
 企業様OEM製作のご依頼
 加盟店加入のご相談

